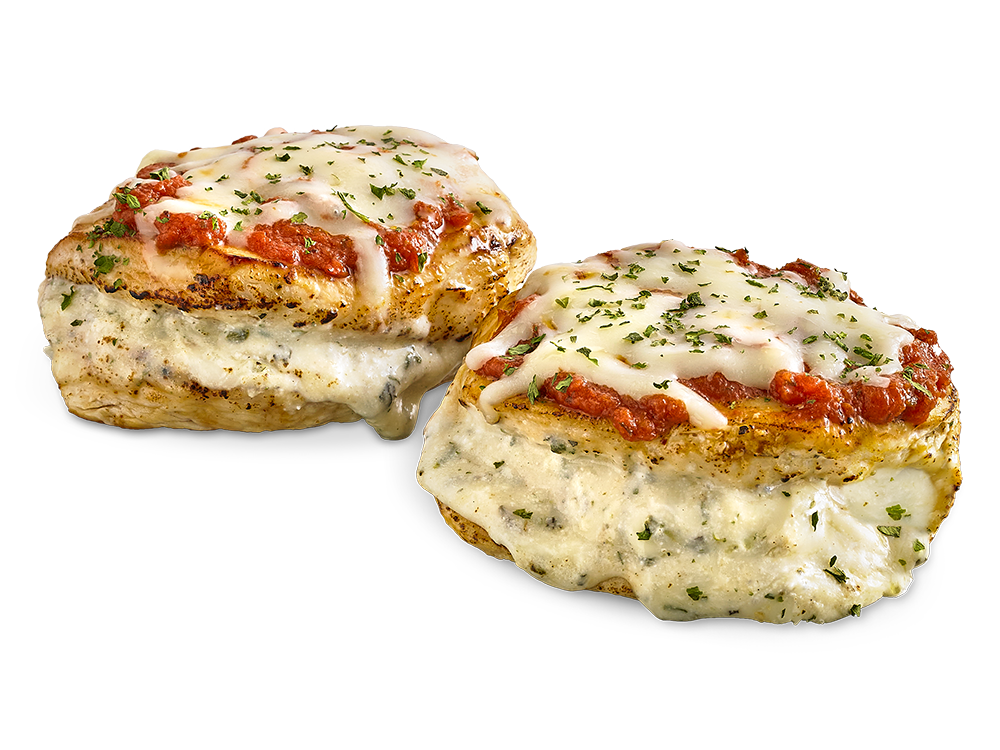
Baking Italian Style Stuffed Chicken Breast in the Oven
Step 1: Thaw and Prep
Our Italian Style Stuffed Chicken Breast is an Oven Grillers classic. Start by thawing the chicken breast in the refrigerator until it’s ready for cooking. Once thawed, carefully remove it from the packaging.
Step 2: Preheat the Oven
Embrace the ease of conventional cooking and preheat your oven to 350°F. While it heats up, station the ready-to-cook Italian Style Stuffed Chicken Breast into an oven-friendly, non-stick pan.
Step 3: The Baking Process
Set the pan in the preheated oven and bake for 20 to 25 minutes. Use a food thermometer to ensure the chicken reaches an internal temperature of 165°F. The personality of your oven might require a shorter or longer duration, so adjust accordingly.
Pro Tip: Encase the chicken breast in aluminum foil for part of the bake. This technique traps steam, infusing more moisture into the chicken and resulting in succulent, tender bites.
Step 4: Rest then Indulge
After baking, let the Italian Stuffed Chicken Breast rest for a bit before you start enjoying.
Complete the dish like a true Italian by adding a side of flavorful bruschetta or marinated grilled veggies. You can prepare these sides on the oven grill as your chicken is baking. Just toss the vegetables in olive oil, salt, and pepper or prepare your bruschetta bread slices, then place them on the grill for the last 10 minutes of the chicken’s bake time.
When it comes to plating, channel your inner artist. Decorate the dish with a sprig of fresh basil, a generous sprinkle of Italian herbs, or a dusting of Parmesan cheese.
With these provisions in place, you’re sure to create an attractive, flavorsome Italian Style Stuffed Chicken Breast meal that’s simple and satisfying. Indulge and enjoy!
Grilled Italian Style Stuffed Chicken Breast – A La Oven Grillers
Step 1: Thaw and Unwrap
Kick start your cooking session by thoroughly thawing the enticing Italian Style Stuffed Chicken Breast. Pop it out from the freezer and let it thaw in the refrigerator. Once it’s thawed and flexible, free it from its trappings, aka packaging.
Step 2: Get the Grill Ready
Let’s turn up the grill on this one. Heat up your oven grill to medium. While waiting, line the rack of the grill pan with foil and lay the perfumed Italian Style Stuffed Chicken Breast on it.
Step 3: Cook to Perfection
Grill the product until it achieves a tantalizing golden brown color and the internal temperature is a safe 165°F. Depending on your oven’s temperament, this could be quicker or slower, so always keep an eye and thermometer handy.
Cooking Tip: Rotate the chicken breast halfway through the cooking process. This ensures an even cook and prevents the outside from getting too charred while the inside is still cooking.
Step 4: Let it Breathe and Eat!
After grilling, grant the grilled chicken a moment’s rest to let the juices recirculate, before you slice it up.
To serve an authentic Italian meal, pair this stuffed chicken with a side of rosemary and olive oil roast potatoes. Get your potatoes ready before heating up the grill and place them in the oven with the chicken to ensure both are ready at the same time.
Lastly, let’s plate it up for Instagram! Sprinkle some basil leaves and thyme on top of the chicken for a burst of color. Add a few dollops of marinara sauce onto the plate for contrast and added flavor. Now you’ve not only cooked a great meal but you’ve dazzled with presentation too. Here’s to a delicious meal, salute!
Air Fryer Italian Style Stuffed Chicken Breast
Step 1: Thaw and Prep
Get started with the succulent Italian Style Stuffed Chicken Breast from Oven Grillers. Defrost the product inside your refrigerator until it’s thawed perfectly. Then, remove the chicken breast from its packaging – it’s now ready for its air fryer journey!
Step 2: Preheat Air Fryer
Preheat your air fryer to 370°F. While you’re waiting for it to heat up, place your thawed Italian Style Stuffed Chicken Breast in a pan that’s been coated with non-stick spray or is naturally non-stick.
Step 3: The Air Fryer Adventure
Pop the pan into your preheated air fryer and let it cook for 18-20 minutes, or until the stuffed chicken breast registers an internal temperature of 165°F on a food thermometer. If your fryer cooks too quickly, check the temperature a bit earlier. But if your air fryer is on the slower side, it might require a bit longer.
Cooking Tip: Once you hit the half way mark, cover the chicken with tin foil to keep it juicy and delicious.
Step 4: Rest and Serve
After the air frying process, let the chicken rest for a couple of minutes before serving.
To create a culinary masterpiece, pair this Italian stuffed chicken breast with a side of garlic bread or Mediterranean salad. While your air fryer preheats, prepare these sides, and cook them alongside your main dish for an efficient meal preparation.
For a truly beautiful presentation, garnish the plate with sprigs of fresh thyme or oregano, and a generous sprinkle of parmesan cheese, both on the chicken and drizzled around the plate. The result is an exquisite Italian Style Stuffed Chicken Breast prepared with your air fryer – a meal that would impress even the most discerning Italian food lovers. Bon appetit!
